How to Roast Beets

How to Roast Beets

Step 1 of 6

Start With Fresh, Firm Beets

Roasting beets intensifies their flavor, brings out their earthy sweetness, and makes their peels as easy to peel off as an over sized sweater. Roasted beets are particularly delicious in beet salads.

Start with beets that are firm and feel heavy for their size. If the beets came with their greens still attached as pictured above, cut off the greens, wash them.

Rinse any dirt or debris from the beets—some beets may need to be scrubbed clean—and put the beets on a large piece of aluminum foil and preheat the oven to 375°F.

Note: Beets are fairly flexible veggies, if you have something else in the oven at anywhere between 325°F and 425°F, beets will happily roast up at that temperature alongside what you’re already cooking, it just will take a bit longer at lower temperatures.

Step 2 of 6

Drizzle Beets With Oil Before Roasting

Drizzle the beets with a bit of oil before roasting. I like to use olive oil, but grape seed oil or canola oil work just fine, too. Sprinkle the beets with salt, too, if you like.

Note: If you’re planning on making a salad with the roasted beets, feel free to use plenty of oil here—you can use the beet-infused oil in the dressing.

Step 3 of 6

Make a Foil Packet for Roasting Beets

For an even roasting of the beets, fold the foil over them and crimp the sides closed. This helps keep them moist, it also helps contain the powerfully staining juices they’ll emit while roasting and make clean-up a snap.

Roast beets until tender. The amount of time this will take can vary greatly depending on the size of the beets, how many there are, if other things are in the oven, and how fresh the beets are (fresher beets cook up faster). For smaller beets, start checking them for tenderness at about 25 minutes. Larger and older beets can take up to an hour.

Step 4 of 6

Let Beets Cool

Remove the beets from oven when tender (you should be able to easily pierce them with a fork). Open up the foil packet and let them sit until cool enough to handle.

Step 5 of 6

Peel Roasted Beets

When the beets are cool enough to handle, slip their peels off. You can use a paring knife, if you like, but you can also marvel at how easily the peels come off with just a rub of your fingers.

Step 6 of 6

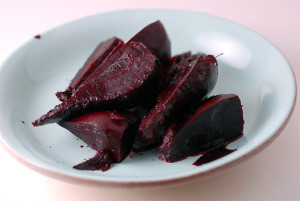
Roasted Beets, Ready to Serve or Use

Serve peeled roasted beets as-is, with a drizzle of olive oil and a sprinkle of salt. Or slice and use them in salads. Roasted beets are particularly tasty with highly flavorful but creamy white cheeses – feta and goat cheese are excellent choices. They also pair well with roasted nuts like walnuts or hazelnuts, as well as fresh herbs like dill and parsley.

I’m always delighted with how well beets work with other sweet fruits and vegetables, particularly oranges, peaches, and tomatoes, which all share a tang within their sweetness that sets off beets quite nicely.

roasted-beets-


Kate from learnandgrowbooks.com

Kate is the founder of Learn and Grow Books, which is a website for parents and teachers of pre-K children.

Make Your Own Wrapping Paper

Make Your Own Wrapping Paper

Make your own wrapping paper with unique materials. Add a creative touch to your gifts and make your own wrapping paper. As adorable as the rows of store-bought holiday wrapping paper look, the price tag is enough to turn even the most die-hard holiday fanatic into a Grinch. Eschewing pricey paper doesn’t mean that you can’t have pretty presents; it’s easy to make your own wrapping paper. Encourage your child to look for snazzy wrapping materials around your home, and this year’s presents will look gorgeous on the cheap! Your child will learn the importance of recycling as he receives a lesson in present-wrapping basics.

What You Need:

  • Newspaper
  • Old calendar pages
  • Old pillowcases
  • Coffee cans
  • Decorated paper
  • Maps
  • Waxed paper art

What You Do:

Newspaper:

  • This one’s a classic, but for good reason! The crisp black and white paper looks top-notch when wrapped around a box and tied with pretty colored ribbon. Have your little one search for his favorite pages to use, and suggest that he turns to the inside pages or the classifieds if he likes the appearance of words over pictures.

Old Calendar Pages:

  • Out with the old; in with the new! Instead of just tossing away your old agenda or calendar pages, invite your child to use them to make creative wrapping paper. Small gifts can be wrapped using just one calendar page, or he can layer and tape calendar pages together to wrap larger presents.

Old Pillowcases:

  • Pillowcases are a particularly pretty way to wrap up presents. Recipients will be impressed that your child has covered his presents with cloth, but there’s very little effort involved. Show your child how to use the pillowcases as he would paper (fold and tape them into place), or simply put his gift inside the case and tie it up with a pretty bow!

Coffee Cans:

  • If your family drinks a lot of coffee, this one is a no-brainer! Those shiny silver cylinders are perfect for gifts on the smaller side—just clean them out, have your child slip his gift inside, and pop on the lid. Finish it off with a festive ribbon and wait for the family’s “oohs” and “ahhs”!

Decorated Paper:

  • Big rolls of brown paper are great for various art projects and are generally inexpensive. If you have one lying around, invite your child to have at it! He will gain valuable wrapping practice with this easy-to-work-with paper, an activity that is very beneficial for his motor skill development. Gifts look great wrapped in the neutral paper alone, but sponging or stenciling on bright paint will really liven them up!

Maps:

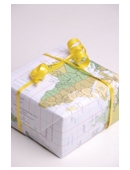
  • When you cross a state line or visit a national landmark, free maps are often provided at the visitor’s center. Start hoarding these, as they make interesting (and informative!) wrapping paper. Have your child wrap up a gift for someone who loves to travel, and his present will be a double-whammy!

Waxed Paper Art:

  • This one requires slightly more effort, but it’s worth it in the end! Ask your child to collect an assortment of flower petals and leaves; a greater variety makes for more interesting packaging. Pull out the ironing board, spread a plain cloth on top of it, and place a sheet of waxed paper on top of that. Invite him to scatter the petals and leaves until he’s happy with the way they look. Put the second sheet of waxed paper over the arrangement, and help him carefully press the iron across the paper. The heat of the iron glues the sheets of waxed paper together, creating adorable floral wrapping paper!

make-recycled-wrapping-paper-bigthumb

Kate from learnandgrowbooks.com

Kate is the founder of Learn and Grow Books, which is a website for parents and teachers of pre-K children.
Dessert Pizza

Dessert Pizza

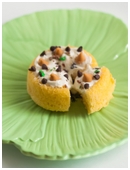
Looking for a healthy alternative for your preschoolers next birthday bonanza? Try out this surprisingly nutritious and wonderfully delicious dessert pizza!

What You Need:

  • Pound cake
  • Butter knife
  • White frosting
  • Various fruits
  • Small candies and toppings
  • Spatula

What You Do:

  1. Pull out your store-bought pound cake.
  2. With a butter knife, carefully cut out simple pizza topping shapes. (These can be as simple as pepperoni and olives or as elaborate as mushrooms and sliced bell peppers).
  3. Leaving said pizza impressions in the cake, find similar-looking fruit choices to match the molds.
  4. Sculpt your fruit choices accordingly if they do not properly fit their intended molds. (Examples of fruit to pizza topping molds you can use for this activity: banana slices for your pepperoni, grapes or blueberries for green and black olives, orange slices for tomato slices, etc.).
  5. Once sculpted, pair each fruit choice up into different stations with one or two less healthy cake topping choices. (Unhealthy cake topping choices can include hard candies, chocolate, sprinkles, marshmallows, cookies, etc.).
  6. Ensure that your unhealthy cake topping choices do NOT fit any of the molds on the cake.
  7. Once ready, pair your children up into two different teams.
  8. Place one child at each station and have them race to fill in their pizza molds. (To up the difficulty of this activity, assign different topping molds for each team to fill in).
  9. Upon completion of this relay race, allow the winners of the race to choose their slices of cake first.
  10. As soon as cake has been handed out to each child, allow them to finish decorating their cake slices with white or vanilla frosting (whichever you have on hand).
  11. Adults, be sure to help the children with this part of the activity if they are using knives to frost their cake pieces instead of rubber spatulas.
  12. Allow your children to dig in and enjoy a healthy fruit cake they made themselves as soon as their personalized pizza desserts are complete.

file_621353

Kate from learnandgrowbooks.com

Kate is the founder of Learn and Grow Books, which is a website for parents and teachers of pre-K children.
Hanging Pot

Hanging Pot

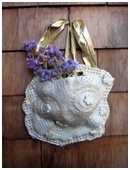
Sculpting with clay is a great activity for young children because it lets them get artistic while helping them develop their fine motor skills. They also get some practice with color and shape recognition, without even realizing it. Your preschooler will learn the artistic process as she makes her lump of clay morph into a functional hanging wall pot that she’ll enjoy filling with grasses she’s collected herself. Added bonus? This project makes a great kid-made gift—perfect for Mother’s Day, Easter, or any other holiday where your child doesn’t want to come empty-handed.

What You Need:

  • Nylon rope, cut into 8, 24-inch lengths
  • Ribbon
  • Air-dry clay
  • Small plant, or herbs
  • Small rocks
  • Planting dirt
  • Acrylic paint
  • Paintbrushes
  • Scissors

What You Do:

  1. Show your child how to mold the clay into a shape that she likes and that will serve as a functional pot. Be sure to make a handle for the rope and ribbon that will be used to hang the finished pot. Add intentations and designs to make the pot visually interesting. Allow the pot to dry completely.
  2. Help your child take the eight pieces of cut nylon rope and tie all of the pieces in a knot at one end. Leave a bit of a tassel, about 3 inches, on the end of the rope.
  3. Place the knot to the bottom of the table.
  4. Separate the rope into four sections, or two pieces of rope per section.
  5. Now, have her tie each section of rope together in a small knot. Leave at least an inch between the big knot and the small knot.
  6. Tie the ribbon through the handle

Have her continue connecting the rope through knots until it will securely hold her pot in place. Now, it’s time to plant! She can place a small handful of rocks in the bottom of the pot, followed by a couple of spoonfuls of dirt, then the plant, followed by a bit more dirt. Water your plant as directed.

impress-wall-pot-bigthumb

Kate from learnandgrowbooks.com

Kate is the founder of Learn and Grow Books, which is a website for parents and teachers of pre-K children.
Decorative Light Switch Covers

Decorative Light Switch Covers

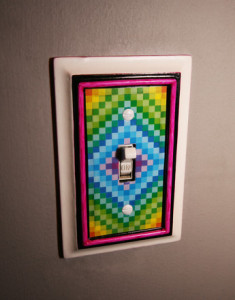
Have a budding decorator on your hands? One quick and inexpensive way to update your child’s room is to decorate the switch plate, the removable plate that goes over the light switch. There’s nothing to buy and when your child wants a new design, you simply make another! It’s a great way to personalize a room, or coordinate with the theme of the room.

What You Need:

  • A screwdriver
  • White paper
  • Scissors
  • A pencil
  • Water-soluble glue
  • Tape
  • Markers, stickers, glitter glue, etc.

What You Do:

  1. Unscrew the switch plate from the wall. Set the screws aside, and make sure to tell your child not to touch the light switch until the switch plate is screwed back on.
  2. Put the switch plate on the paper and trace it with a pencil.
  3. Cut out the shape and leave an extra inch around each side.
  4. Help your child glue the paper to the front of the switch plate, then tuck the extra inches of paper behind the back and tape it down. Let the glue dry.
  5. Now for the fun part! Hand your child the markers, glitter glue, and stickers and let her decorate the switch plate in any way she wants, whether it’s pirates, dinosaurs, or hearts and glitter! When she’s finished, let the glitter glue dry.
  6. Screw the switch plate back in place, and be sure no little fingers are anywhere near the light switch.
  7. Then admire the useful artwork! When your child wants a new design or the picture fades from frequent use, remove the switch plate, peel off the paper, and soak it in warm water until the glue comes off. Then make a new design–the possibilities are endless!
 decorative-light-switch-covers-slideshowmainimage

Kate from learnandgrowbooks.com

Kate is the founder of Learn and Grow Books, which is a website for parents and teachers of pre-K children.
Double Chocolate Tiramisu

Double Chocolate Tiramisu

I will be making this for my Christmas dessert.

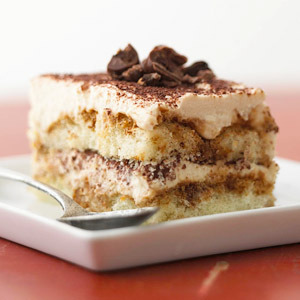
Chocolate fans will cheer this twist on tiramisu: It has ladyfingers infused with cocoa instead of espresso and an ethereal filling of chocolate and cream cheese. One bite and you’ll be transported to your favorite trattoria.


  • Prep:
  • Total Time:
  • Servings: 10

Ingredients

  • 2 tablespoons unsweetened cocoa powder, plus more for garnish
  • 1 1/2 cups heavy cream
  • 4 ounces semisweet chocolate, chopped
  • 1 bar (8 ounces) cream cheese, room temperature
  • 3/4 cup sugar
  • 24 ladyfinger cookies (from a 7-ounce package)

Directions

  1. In a medium bowl, mix cocoa powder with 1 1/2 cups very hot water until dissolved; set cocoa mixture aside. In a small microwave-safe bowl, place 1/4 cup cream and chocolate; microwave in 1-minute increments, and stir until melted. Cool to room temperature.

  2. Transfer cooled chocolate mixture to a mixing bowl; add cream cheese and sugar. Using an electric mixer, beat until blended. Add remaining cream; beat chocolate filling until fluffy, about 2 minutes.

  3. Spread 1 cup chocolate filling in the bottom of a 2-quart serving dish. One at a time, dip 6 ladyfingers in cocoa mixture, then arrange in a single layer in dish; spread with 1 cup chocolate filling. Repeat with three more layers, ending with filling.

  4. Cover tiramisu, and refrigerate at least 2 hours (or up to 2 days). Dust with cocoa powder before serving.


A tasty kid-friendly version of tiramisu! I used mascarpone cheese because I prefer it.
I can easily find ladyfinger cookies in the cookie section of any grocery store, but you could also try an Italian bakery or deli, they usually carry tiramisu ingredients including ladyfingers.
If you want to add coffee liquor, you could add it to the cream cheese mixture but this might make it runny, I’d put it in the cocoa water and soak the ladyfingers in the liquor mixture.

Double Chocolate Tiramisu

Kate from learnandgrowbooks.com

Kate is the founder of Learn and Grow Books, which is a website for parents and teachers of pre-K children.
Non-Slip Socks

Non-Slip Socks

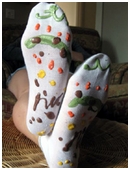
Non-slip socks are the perfect DIY gift that your kid can make for friends and family. Don’t empty your wallet forking out money for your child’s gifts! With just a few inexpensive and readily available materials, your child can check a friend or relative off of his gift list. This delightfully simple non-slip socks activity results in colorful socks that prevent sliding on hardwood floors. The recipient of these non-slip socks will be ever so grateful, while your child will be proud to give away this thoughtful gift! Make a pair of non-slip socks with your kid for wholesome family fun.

What You Need:

  • Clean cotton socks, adult size
  • Fabric paint in assorted colors
  • Old newspaper

What You Do:

  1. Show your child how to wash and dry the cotton socks. This beginning step provides an opportunity to familiarize him with the laundry room!
  2. Make sure your child’s workspace is lined with newspaper. This painting involved in this project can get messy!
  3. Arrange the socks, bottoms up, with on the paper. Invite your child to paint the bottoms of the socks with fabric paint, either with a design or in a random pattern.
  4. Let the socks dry thoroughly, at least overnight.

Your child can easily wrap these fluffy socks up in a gift bag or with wrapping paper, making it a gift your child can make independently. He will knock someone’s socks off with this one!


non-slip-socks-bigthumb


Kate from learnandgrowbooks.com

Kate is the founder of Learn and Grow Books, which is a website for parents and teachers of pre-K children.